Open any news site right now. Scroll for ten seconds. I’ll wait.
Yep — there it is. AI. Robots. Some headline about a robot doing something a human used to do, followed by either breathless excitement or mild existential dread, depending on the publication.
Robots and AI are everywhere. In the news, in your social media feed, in that one conversation at every dinner table where someone’s uncle confidently explains how “the machines are taking over.” You can’t escape it.
So at some point — maybe in a random Tuesday afternoon moment of weakness, or during a slow morning coffee — the thought crossed your mind:
“What if I actually tried to learn this stuff?“
And then, almost immediately, came the follow-up:
“Where do I even start? How much will this cost? Should I just buy one of those robot kits?“
If you’ve been there, welcome. You’re in the right place.
The First Step: Search “What is a Robot?” (Warning: Don’t Do This)
Here’s what happens when most people first get curious about robotics. Full of enthusiasm, they open a browser, type “what is a robot,” and confidently hit Enter.
Then Wikipedia shows up.
“A robot must have some — though not necessarily all — of the following properties: Not naturally occurring. Capable of sensing its environment. Able to interact with objects. Possessing some degree of intelligence and the ability to make choices based on its environment, controlled automatically according to a pre-programmed sequence…“
By the end of the second sentence, that initial excitement has packed its bags and left the building.
We’ve all been there.
The MonkeyTaco Definition of a Robot
Forget the textbook definitions. For everything we do on this blog, here’s our working definition — short, practical, and impossible to argue with over coffee:
If it’s programmed to do something automatically, it’s a robot.
That’s it. We’re done. Moving on.
So What Are We Actually Doing Here?
This blog exists because robotics is fascinating, increasingly relevant, and — if you’re not careful — surprisingly accessible. Even if you’re working with a tight budget, limited experience, and nothing but a laptop and a stubborn curiosity.
Here at MonkeyTaco, we’ll explore robotics together across four levels:
| Level | What You Need | What You Build |
|---|---|---|
| 🟢 Level 0 | Just a laptop/PC | Software simulations, AI models, virtual sensors |
| 🟡 Level 1 | Under $30 | Arduino + basic sensors, simple automations |
| 🟠 Level 2 | Under $100 | Raspberry Pi projects, camera modules, obstacle avoidance |
| 🔴 Level 3 | $100–$200 | Practical robots you can actually use in real life |
We start at Level 0. Because the best first step is the one that costs nothing.
Your Laptop Is the Robot (For Now)
Before we touch a single wire or spend a single dollar, we’re going to build something real using only the laptop or desktop you already have.
Specifically: we’re going to give your laptop eyes.
Your webcam — that little camera you mostly use for video calls and accidentally leaving on — is, technically, a sensor. Robots use sensors to perceive the world. And perception is where everything begins.
By the end of this post, your laptop will be able to look at the world through its webcam and recognize objects in real time. Put a coffee mug in front of it — it’ll know it’s a mug. Stand in front of it — it’ll know you’re a person. Hand it your phone — it’ll say “cell phone.”
Think of it like teaching a baby its first words. “Person.” “Chair.” “Dog.” “Remote control.”
Except this baby runs on Python and never needs a nap.

A Few Concepts First (I Promise This Won’t Hurt)
Our robot needs three things to work:
1. A brain (code)
Robots are programmed. Someone has to give them instructions. We use programming languages to do this — and for robotics, Python is the language of choice. It’s readable, powerful, and has an enormous community behind it. We’ll use Python for almost everything on this blog.
Don’t panic if you’ve never written a line of Python. We’ll learn as we build.
2. A translator (Python interpreter)
Computers don’t understand Python. Or English. Or any human language, really. They only understand ones and zeros — machine code. So we need a translator: something that takes our Python instructions and converts them into something the machine understands.
Think of it like international travel. When you visit Japan, you need a Japanese interpreter. When you visit China, you need a Mandarin interpreter. When you write Python, you need a Python interpreter.
3. A workshop (IDE)
An IDE — Integrated Development Environment — is basically a smart text editor for writing code. It autocompletes things, highlights errors, and runs your code. It’s the difference between writing code in Notepad and writing code like a professional.
Some popular Python IDEs: PyCharm, VS Code, Jupyter Notebook, IDLE. They all work. We’ll use PyCharm Community Edition — it’s free, beginner-friendly, and does everything we need.
Download PyCharm Community Edition here: PyCharm
Setting Up Your Workshop
Once you’ve downloaded PyCharm, run the installer (the .exe file) and follow the setup steps.
When PyCharm opens, click New Project. You can leave everything as default or choose your own folder. Click Create — and if Python isn’t installed on your machine yet, PyCharm will automatically install the latest version for you. Yes, really. One less thing to worry about.
PyCharm will create a virtual environment for your project (called venv). Think of it as a clean, isolated workspace — what happens in this project stays in this project.
Your First Line of Code
Right-click on the project root in the left panel. Select New → Python File. Name it whatever you want — let’s go with hello.
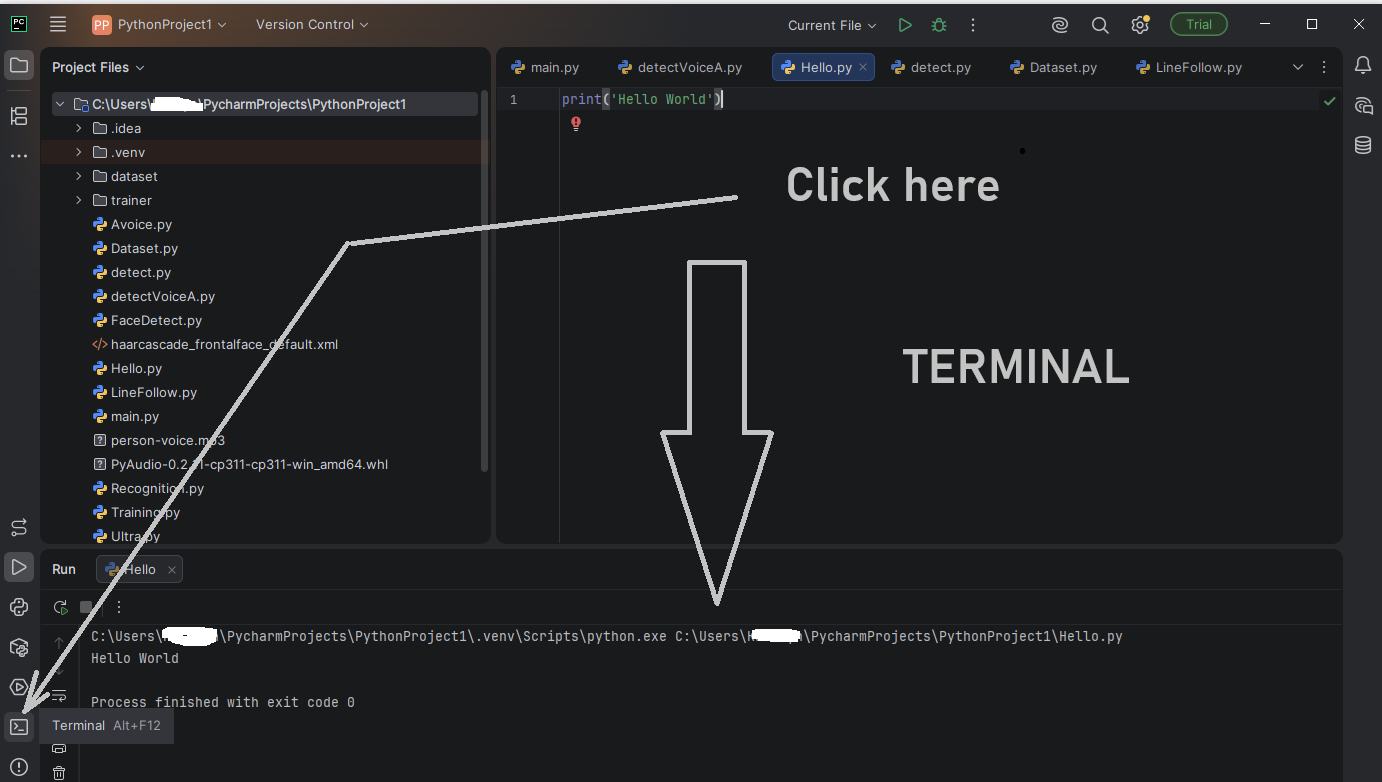
You’ll see a blank editor window. Type this:
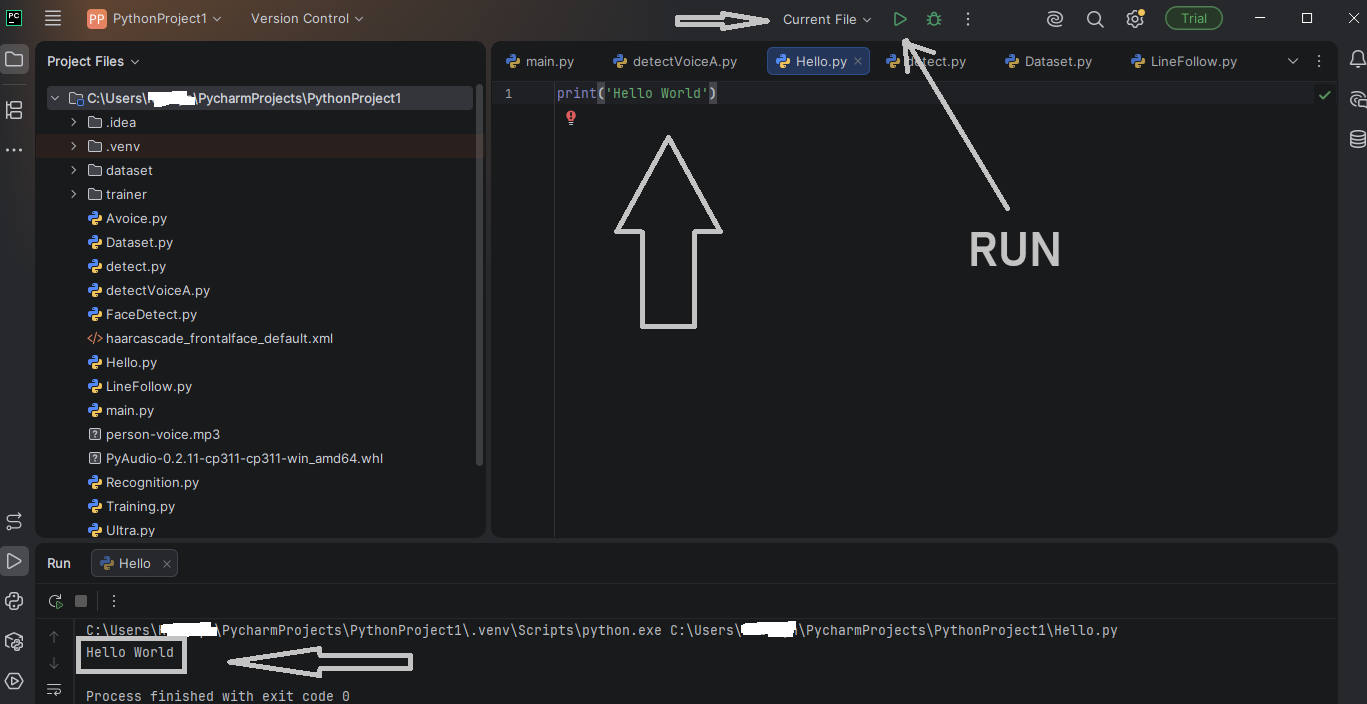
print('Hello World')
Click the four-line menu icon in the top left to show the menu bar if it’s not visible. Then go to Run → Run ‘hello.py’.
At the bottom of the screen, you’ll see:
Hello World
Congratulations. You just told a machine what to do, and it did it. That’s programming. That’s the foundation of every robot on this planet — just significantly more complicated.
Now Let’s Give the Laptop Some Eyes
Time for the actual project. We’re going to use two tools:
- YOLOv8 (via the
ultralyticslibrary) — a state-of-the-art, open-source AI model for real-time object detection. Trained on millions of images. Free to use. - OpenCV — the industry-standard library for image and video processing in Python. Also free.
In plain English: YOLO is the brain that recognizes objects. OpenCV handles the webcam feed and draws the boxes on screen. Together, they turn your laptop into something genuinely impressive.
Step 1: Install the Libraries
In PyCharm, find the Terminal tab at the bottom of the screen (hover over the bottom bar to find it).
Type this command and press Enter:
pip install opencv-python ultralytics
Wait for it to finish. PyCharm will download and install everything automatically.
Step 2: Create the Detection Script
Create a new Python file — call it detect.py. Copy and paste the following code:
import cv2
from ultralytics import YOLO

# Load YOLOv8 nano model - small, fast, perfect for laptops
model = YOLO('yolov8n.pt')

# Open webcam (index 0 = your default webcam)
cap = cv2.VideoCapture(0)

if not cap.isOpened():
    print("Could not open webcam")
    exit()

print("Running object detection... Press 'q' to quit")

while True:
    ret, frame = cap.read()
    if not ret:
        break

    # Run YOLO on the current frame
    results = model(frame)

    # Draw detection boxes on the frame
    annotated_frame = results[0].plot()

    # Show the video feed
    cv2.imshow('MonkeyTaco — Robot Eyes', annotated_frame)

    # Press 'q' to quit
    if cv2.waitKey(1) & 0xFF == ord('q'):
        break

# Release webcam and close windows
cap.release()
cv2.destroyAllWindows()
A quick note: lines starting with # are comments. They don’t affect the program — they’re just notes explaining what each section does. Like sticky notes on code.
Step 3: Run It
Click Run → Run ‘detect.py‘.
Point your webcam at yourself. At your coffee mug. At your phone. At your dog, if you have one.
Your laptop will identify each object in real time, draw a bounding box around it, and label it — complete with a confidence percentage.
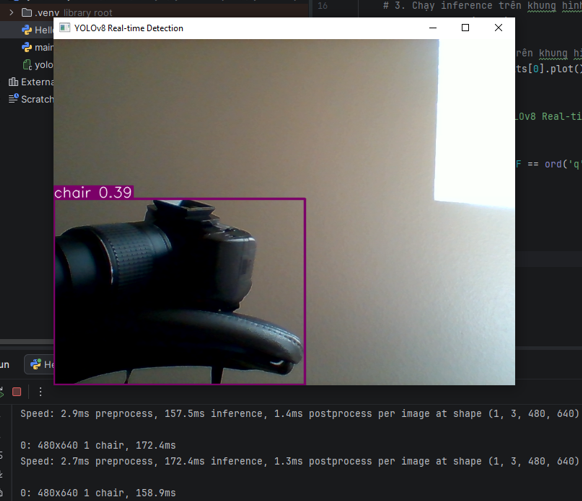
Press q to quit, or click the red Stop button in PyCharm.
What Just Happened?
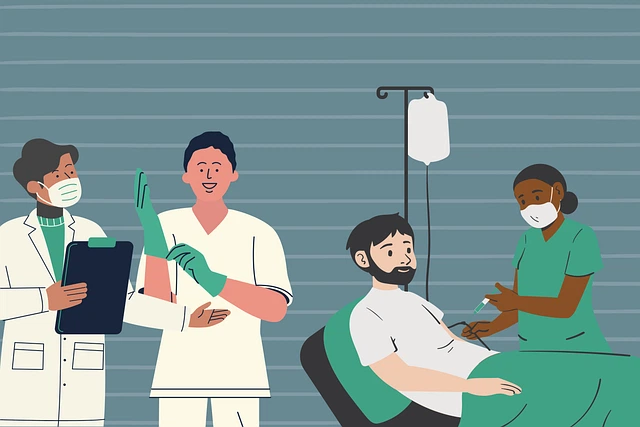
You just built a functional perception system — the same foundational technology used in:
- Hospital robots that navigate corridors without bumping into people
- Fall detection systems for elderly patients
- Surgical assistance robots that track instruments in real time
Yours runs on a laptop and cost $0. Theirs run on six-figure hardware budgets.
The underlying principle? Identical.
What’s Next?
In the next post, we’ll take this same object detection system and make it do something — trigger an alert, log what it sees, or respond to specific objects. We’ll start turning perception into action.
That’s where robotics gets interesting.
And yes, it’s still free.